How to use SecureMail
Configuration
Preparing your Workstation – Do this on every workstation that you will be sending/receiving encrypted/signed email
• Download this SecureMail utility. Click here to download the utility.
• This Guide shows how to use the utlity above. Click here to download the guide.
How to Send a Signed Email
- Compose/reply an email as per normal.
- Toggle the envelope icon that has a red ribbon (as shown in picture below) so that it is depressed.
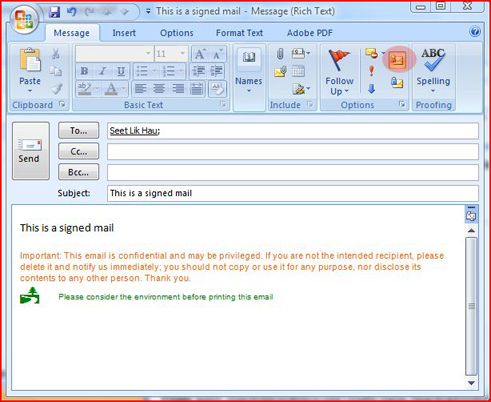
- Send the message.
Click here to view an animated signing of SecureMail
How to Send an Encrypted Mail
- Compose/reply an email as per normal.
- Toggle the envelope icon that has a blue lock (as shown in picture below) so that it is depressed.
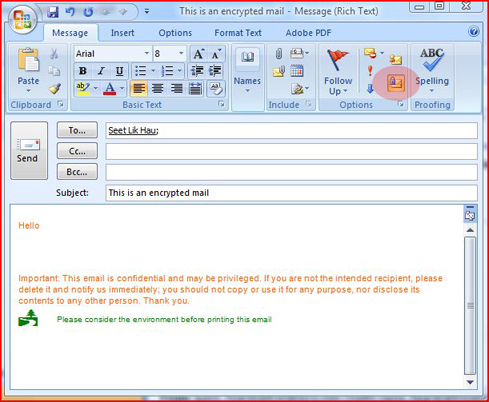
- Send the message.
Click here to view an animated encrypting of SecureMail
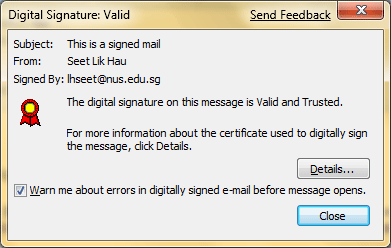
How to Read the Signed Mail and Verify that it is from a Genuine Sender
- When you receive an email in Outlook, and if the email is digitally signed, you will notice a red ribbon on the right side of your email.
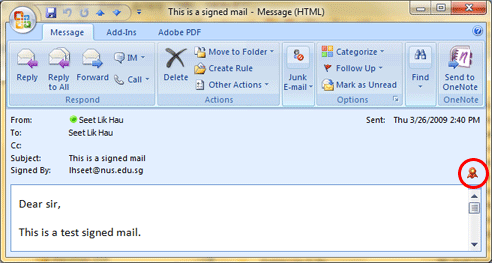
- With a digitally signed mail, you can be assured that the mail is from a genuine sender.
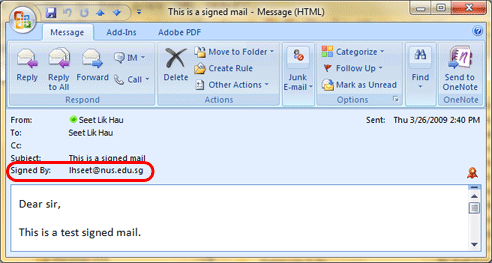
- To verify further on the mail authenticity, you may click on the red ribbon to verify that the signed mail is valid and it is signed by the sender.
How to Identify an Encrypted Mail
In Outlook, you may see the icon ![]() indicating that the email is encrypted. You need to double-click on the email to be able to read encrypted email. When doing so, you will be prompted for the eToken password. This is necessary to retrieve the private key that will be used to decrypt the message.
indicating that the email is encrypted. You need to double-click on the email to be able to read encrypted email. When doing so, you will be prompted for the eToken password. This is necessary to retrieve the private key that will be used to decrypt the message.
