Secure Hard Disk Disposal
Secure Disposal of Hard Disk using Blancco Drive Eraser
It is mandatory to erase and destroy all University data stored in the storage media before disposal. For redeployment of hard disk, use Blancco for secure erasure. For disposal of any functional or non-functional hard disk that the data cannot be erased by Blancco, physical destruction would be required; shred/incinerate Solid State Drive (SSD) and degauss Hard Disk Drive (HDD).
NUS IT Co-op offers these services. You may contact them at 67792942 or email at copnbeq@partner.nus.edu.sg / copnb07@partner.nus.edu.sg. Any cost related to the removal of hard disks or storage media (not limited to notebooks, computers and servers only but also scanners, copiers etc.) and any arrangements required to be made with the equipment suppliers, shall be borne by the faculties and departments. Note that some equipment comes with a built-in feature to reset to factory settings (e.g. iPad), and does not have a hard disk or storage media that can be wiped using Blancco or degauss.
If the destruction or degauss of hard drive service is procured from NUS IT Co-op, a certificate will be issued to the department as a documentary proof upon completion. Should the secure data wiping and/or reset to factory settings be performed by the faculty or department, it shall be certified and verified using this template. Departments shall ensure that a copy of the certificate (either issued by NUS IT Co-op or by the faculties/departments) is given to the OED’s appointed contractor during the collection of the condemned IT equipment.
When you erase a file by using normal means, the file references are deleted and the space formerly occupied by the file is marked as being free. However, the actual file data remains intact on the media until the space is claimed by some other file (at which point the original data is overwritten). However before that happens, deleted data is still recoverable via hard disk utilities which can reverse the delete function. The only way to securely erase files beyond recovery is to have the data overwritten at least once.
Secure Wiping is the process where every single track of the media is overwritten. Before you start using Blancco, ensure that all files, folders, software applications or any other information that you want to save for later use are backed up on an external drive. Data that has been wiped from a data storage drive (e.g. HDD, SDD) with Blancco cannot be recovered by any existing method.
More information on Blancco Drive Erasure can be found here.
Blancco does not require any operating system pre-installed on the PC. It can be booted from a USB flash drive or CD.
System Requirements
• Network: NUS Local Area Network (LAN)
• Plug in the power adapter when using Blancco on a laptop
• For use on NUS owned asset only
Instructions to download Blancco
- Download Blancco ISO image file from here.
- Save the file to your computer. It is recommended that you save the file to your Desktop or another directory where you can easily locate the file.
- Save the file to your hard disk by clicking on Save button. Remember where you save it to. Unzip it and there should be a file with .iso extension; this is the ISO image file we are going to use to burn a CD or USB flash drive.
- Burn the ISO image to a USB flash drive using Blancco USB Creator Tool or a CD using Windows Disc Image Burner.
Instructions to Use Blancco
- Insert the bootable USB or CD to the computer and switch-on the power.
- Check the BIOS boot options to boot from the USB or CD (depends on your selection above)*.
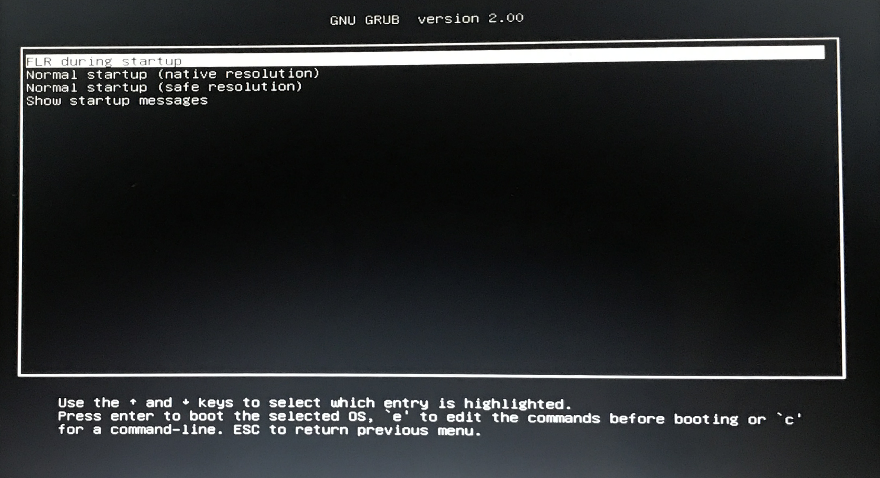
- Select “FLR during startup” and press Enter.
- You will be requested to fill in your NUS-ID credentials. Press F2 or click on Settings on the top right corner. A settings dialog box will pop up > Click on the Network Security tab. Under IEEE 802.1x authentication
a. Ensure “Enabled” is checked.
b. Ensure “PEAPv0/EAP-MSCHAPv2” is selected in the Protocol dropdown.
c. Key in your NUS-ID or ONE ID in the Identity textbox (e.g., cceabc)
d. Key in your NUS-ID or ONE ID password.
e. Click Apply.
*Blancco reports the BIOS (not the OS) date and time after hard disk is successfully erased. You are encouraged to check the correctness of the date and time before initiating data erasure.

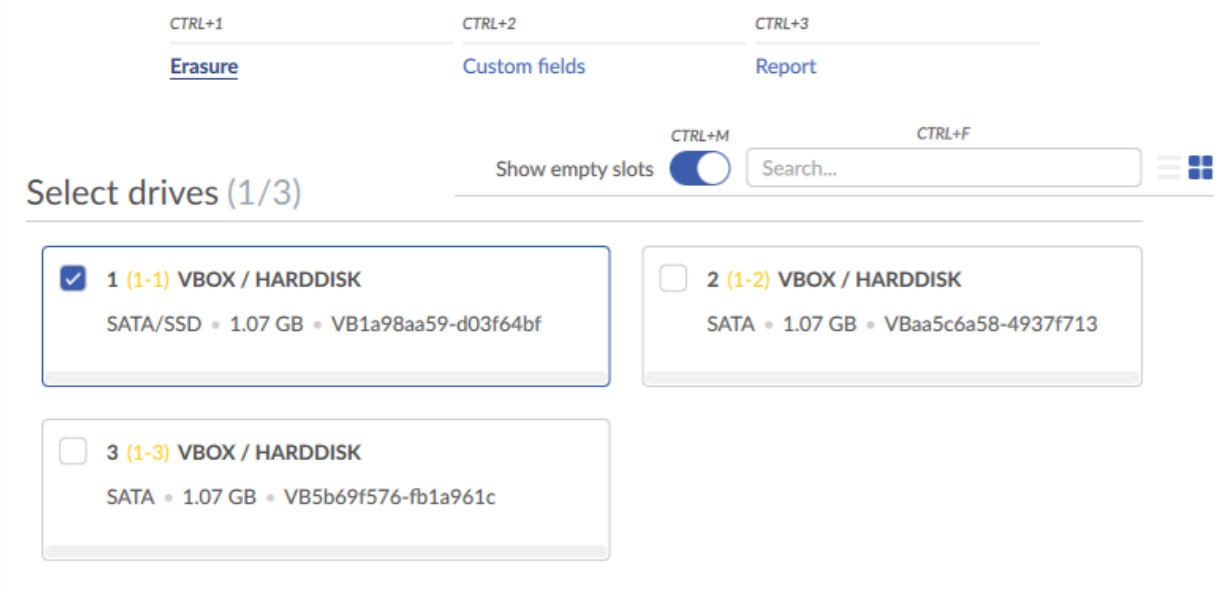
- All drives connected and running in the computer are shown in the view. By default, they are selected for erasure. Please check that the drives have been correctly identified.

- To start the erasure, click the “Erase” button which is located on the bottom right of the screen.
- When the erasure is completed successfully, the system will show the icon below.

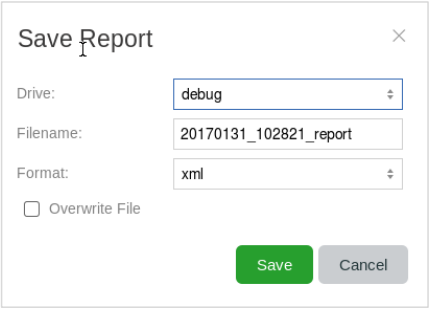
- To save the report, plug your external device (e.g. USB) into the computer, select the drive that you wish to generate the report, click the report icon on the bottom right panel (or press CTRL+ALT+R) and click the “Save” button.


