Deploying HPC cluster in the Cloud
By Yeo Eng Hee, Research Computing, NUS Information Technology
Introduction
A recent paper in March 2019[i] indicated that the number of HPC sites worldwide that run some workloads in the Cloud has increased in proportion from 13% in 2011 to 74% in 2018. This is an indication that more people are looking into the Cloud as an option for running HPC type of workloads, which are characterised by high processor loads, large memory sized models and distributed computation through high-bandwidth, low-latency inter-networking communications between cluster nodes. Cloud service providers recognise this trend. They are making it easier and more attractive for HPC workloads to run in their clouds.
In August this year, a Top500 entry (from Descartes Labs)[ii],[iii] has been reported to be run in the Cloud for US$5,000, without any special assistance from the cloud service provider (Amazon Web Services). In the words of the co-founder of Descartes Lab: “[the] firm just plunked down US $5,000 on the company credit card for the use of a “high-network-throughput instance block” consisting of 41,472 processor cores and 157.8 gigabytes of memory. It then worked out some software to make the collection act as a single machine. Running the standard supercomputer test suite, called LinPack, the system reached 1,926.4 teraFLOPS (trillion floating point operations per second)”. This earned them a place at #136 in the Top500 List.
So, how easy is it to spin up an HPC cluster in the Cloud? In this article, we aim to show how this can be done quickly in an AWS account, with just a few lines on the command line terminal.
Setting Up Your Cloud Account
The first step to creating your personal HPC cluster is to set up your PC or laptop with the AWS command-line tools. The full details can be found on this web page: https://aws.amazon.com/cli/
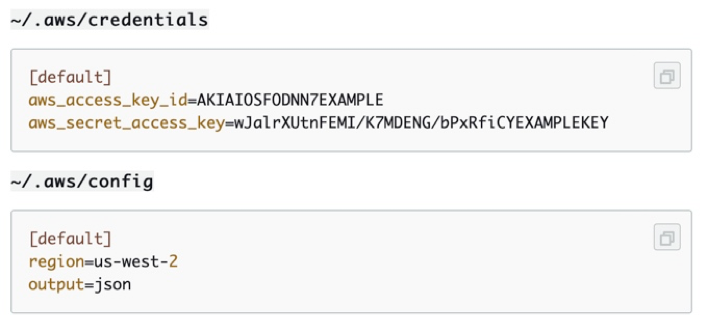
Once the command-line tool is installed, set up your AWS credentials so that the commands that you run from your computer can be authorised in the Cloud. The following are taken from the AWS configuration instructions[iv].
Your AWS credentials consist of the Access Key ID and the Secret Access Key. You need to create these keys via the AWS Management Console (instructions to create this can be found here). After you have created your access keys, set up the AWS command-line tool by typing:
aws configure
and following the prompt when asked to enter your credentials on the command line, as well as the region (ap-southeast-1 for Singapore) and output format (choose the default json format). The configuration tool will set up two files in your .aws folder in your home directory: credentials and config, as shown below.

This is all you need to do to set up your account for the subsequent HPC cluster creation.
Setting Up AWS ParallelCluster
To begin using AWS ParallelCluster tools, first install the pcluster utility. This is described in the AWS webpage here. Choose the method that suits your PC, whether it is Linux, Mac OS or Windows PC. Once installed, and the pcluster command is available on your command line, you should be able to see this when you type the pcluster version command:
% pcluster version
2.5.0
Another item to prepare would be the SSH key pair to use for accessing the new HPC cluster. If you have not already done this, go to the AWS Console, and navigate to the EC2 dashboard, and click on Key Pairs to create a new key pair.
With these, you are now ready to configure your HPC cluster on the Cloud:
Step 1: Run pcluster configure
Run the following command on the command line and follow the prompt for all the requested options/parameters:
% pcluster configure
Options:
|
Parameter |
Value |
Alternative options (if any) |
|
AWS Region ID |
ap-southeast-1 |
|
|
EC2 Key Pair Name |
enter the name of the key pair you created above |
|
|
Scheduler |
torque |
1. sge 2. torque (similar to PBS Pro) 3. slurm 4. awsbatch |
|
Operating System |
alinux |
1. alinux 2. centos6 3. centos7 4. ubuntu1604 5. ubuntu1804 |
|
Minimum cluster size (instances) |
0 |
|
|
Maximum cluster size (instances) |
10 |
Choose your own cluster size to suit your budget and needs |
|
Automate VPC creation? |
Y |
|
|
Network Configuration |
1 |
1. Master in a public subnet and compute fleet in a private subnet 2. Master and compute fleet in the same public subnet |
Once you have entered the values in the table above, AWS ParallelCluster will begin creating your cluster configuration using AWS CloudFormation. This does not start up any cluster yet. To start a cluster running, you need to go to the next step.
Step 2: Run pcluster create
Choose a name for your new cluster, and type the following command:
% pcluster create MyCluster01
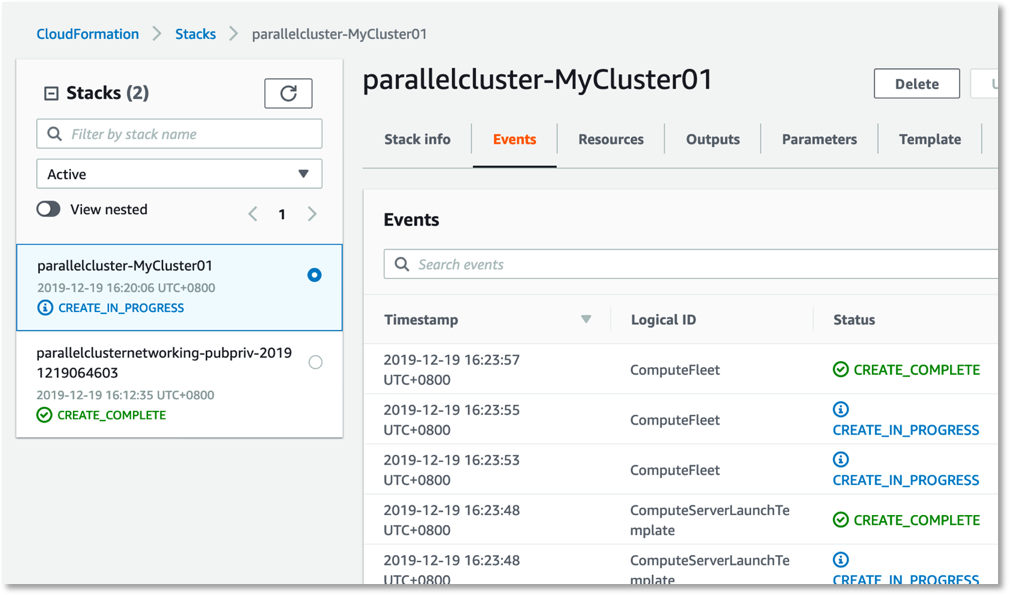
AWS ParallelCluster will start provisioning a new HPC cluster for you. You can monitor the progress on the command line, or in the CloudFormation dashboard:


Once the CloudFormation event says “parallelcluster-MyCluster01 CREATE_COMPLETE”, the cluster is ready for you to use.
Step 3: Login to the cluster’s master node
To login, issue the following command:
% pcluster ssh MyCluster01 -I [full path to your ssh key pair file created above]
You can run a sample job to test your cluster:
[ec2-user@ip-10-0-0-201 ~]$ vi hello.sh
Enter the following lines into the hello.sh file using the vi editor above:
#!/bin/bash
sleep 30
echo "Hello World from $(hostname)" >> output.txt
And submit the job using the qsub command:
[ec2-user@ip-10-0-0-201 ~]$ qsub hello.sh
You should see a Compute node starting in the EC2 dashboard:

Once the job is complete, you should see the output in the file output.txt:
[ec2-user@ip-10-0-0-201 ~]$ qstat
Job ID                        Name             User            Time Use S Queue
-------------------------     ---------------- --------------- -------- - -----
0.ip-10-0-0-201.ap-southeast- hello.sh         ec2-user               0 R batch
[ec2-user@ip-10-0-0-201 ~]$ cat output.txt
Hello World from ip-10-0-22-17
Step 4: deleting your cluster
It is always good practice to terminate your cluster after you have completed your job. Leaving your cluster idle will incur unnecessary cost for your cloud account. Check your Billing Dashboard regularly so that you are updated on your current cloud usages. You can also use the Budget function in your Billing Dashboard to alert you if your usage reaches a certain pre-determined threshold limit.
% pcluster delete MyCluster01
Deleting: MyCluster01
Status: DynamoDBTable - DELETE_COMPLETE

Conclusion
By following the steps above, you can quickly spin up a cluster to run your HPC workloads in the Cloud. The above is just a simple demonstration using AWS ParallelCluster, with the Torque job scheduler, which is similar to our PBS Pro job scheduler in HPC. For more information on running more complex jobs in torque, refer to their web page here.
References:
[i] Hyperion Research paper entitles “Cloud Computing for HPC Comes of Age” (https://d1.awsstatic.com/HPC2019/Amazon-HyperionTechSpotlight-190329.FINAL-FINAL.pdf)
[ii] IEEE Spectrum article on “Descartes Labs Built a Top 500 Supercomputer From Amazon Cloud” (https://spectrum.ieee.org/tech-talk/computing/hardware/descartes-labs-built-a-top-500-supercomputer-from-amazon-cloud)
[iii] Entry #136 Top500 List: https://www.top500.org/system/179693
[iv] See: https://docs.aws.amazon.com/cli/latest/userguide/cli-configure-files.html

