HPC Portal (Display Manager)
Step 1: Login https://hpcportal.nus.edu.sg/

Step 2: Registration of Your Account

If it shows “you have already registered”, click on to proceed.

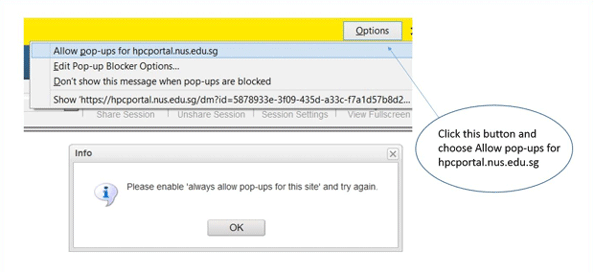
Step 3: Allow Popup on Your Web Browser

Step 4: The First Login Page

Step 5: General Settings

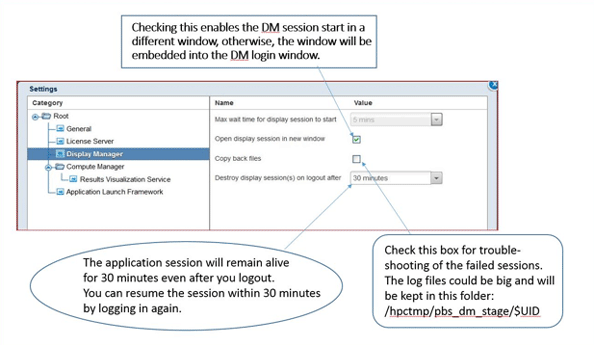
Step 6: Display Manager Settings

Step 7: Graphic Applications Session

Step 8: Collaboration with Other Users

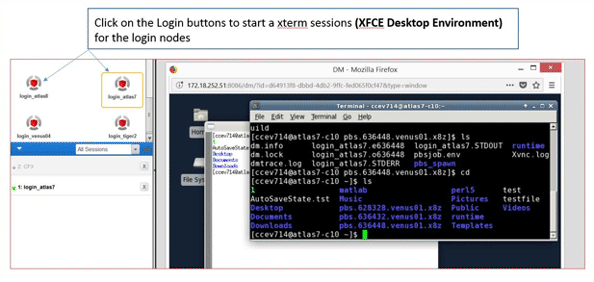
Step 9: X-term Sessions

Step 10: Panel Button
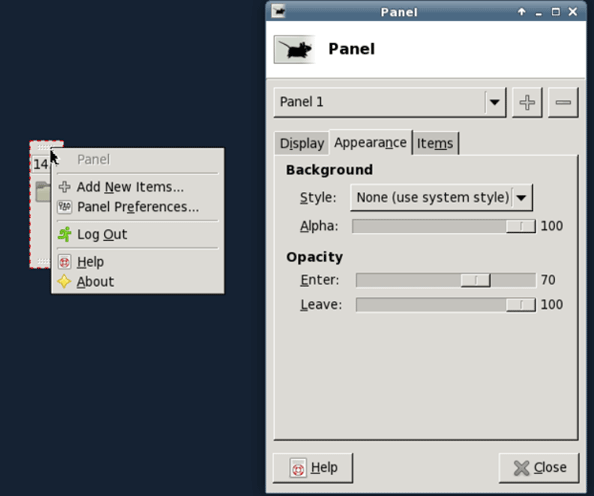
A small square button may appear at the desktop after login. This is a Panel button which can be used to manage the panel sessions and graphics sessions. Right click to start the “Preference” setting widow to change the panel size, panel appearance and add/remove items you want to display on the panel.

New HPC Portal (Display Manager)
Step 1: Login https://hpcportal.nus.edu.sg/

Step 2: Registration of Your Account

If it shows “you have already registered”, click on to proceed.

Step 3: Allow Popup on Your Web Browser

Step 4: The First Login Page

Step 5: General Settings

Step 6: Display Manager Settings

Step 7: Graphic Applications Session

Step 8: Collaboration with Other Users

Step 9: X-term Sessions

Step 10: Panel Button
A small square button may appear at the desktop after login. This is a Panel button which can be used to manage the panel sessions and graphics sessions. Right click to start the “Preference” setting widow to change the panel size, panel appearance and add/remove items you want to display on the panel.

